Keap Connection
Manage your OAuth connection, SAK backup key, and Custom OAuth app for Keap.
Connect InfusedWoo with your own Keap Developer App for dedicated API limits and better performance on high-volume stores.
Why Use Custom OAuth?
Keap applies API rate limits based on the OAuth app making the requests:
| Connection Type | Daily Limit | Per-Minute Limit | Notes |
|---|---|---|---|
| Standard OAuth (InfusedWoo’s shared app) | 500,000 shared | ~240/min | Shared across all InfusedWoo users on the same app |
| SAK / Personal Access Token | 30,000 calls | ~240/min | Dedicated to your account |
| Custom OAuth (your own app) | 150,000 calls | 1,500/min | Dedicated to your app only |
Standard OAuth uses InfusedWoo’s shared app which has 500,000 daily calls split across all users. During peak times, you may experience throttling. A custom OAuth app gives you dedicated limits — 150,000 daily calls and 1,500/min that are yours alone.
Prerequisites
- A Keap Developer account at developers.keap.com
- An active InfusedWoo installation connected to Keap (standard OAuth or SAK)
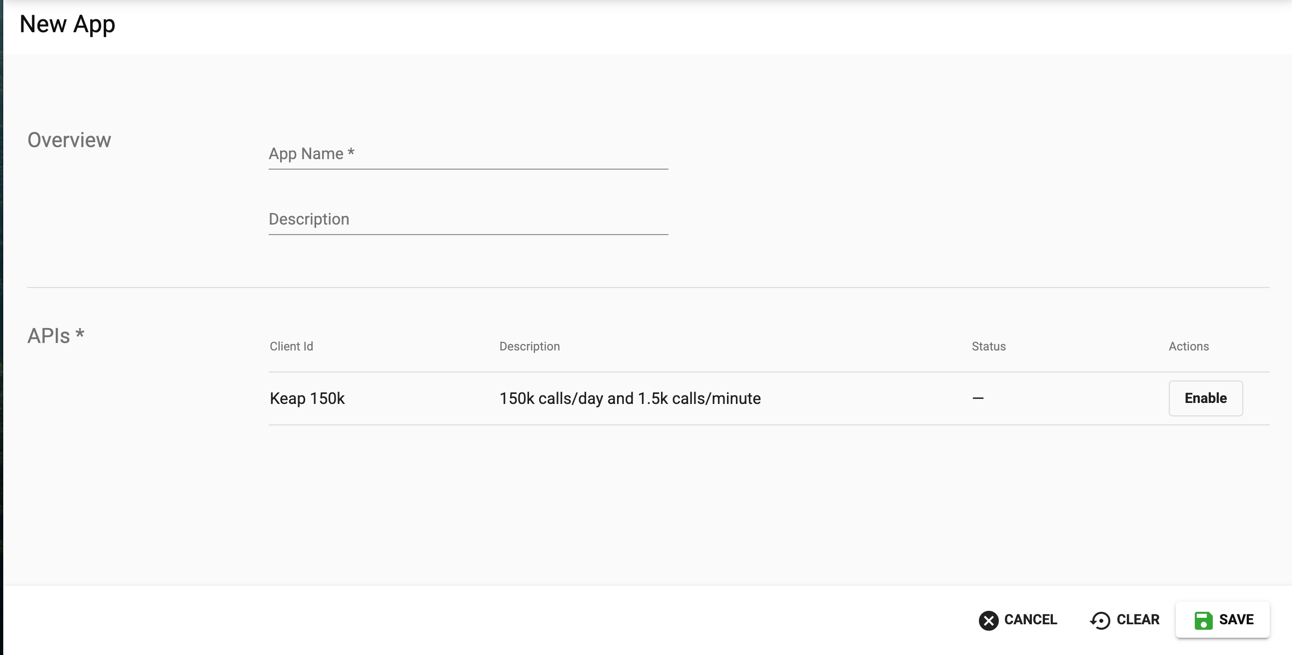
Step 1: Create a Keap Developer App
- Go to developers.keap.com and log in
- Navigate to Apps and click New App
- Fill in the app details:
- Name — e.g., “My Store - InfusedWoo”
- Description — e.g., “Custom OAuth for InfusedWoo integration”
- Click Save
No redirect URI setup is needed — InfusedWoo handles this automatically in the backend.
Step 2: Get Your Credentials
After creating the app:
- Go to your app’s settings page on the Keap Developer portal
- Copy the Client ID (also called App Key)
- Copy the Client Secret (also called App Secret)

Keep your Client Secret safe. Do not share it publicly or commit it to version control.
Step 3: Connect InfusedWoo
- In your WordPress admin, go to InfusedWoo > Settings > Keap Connection
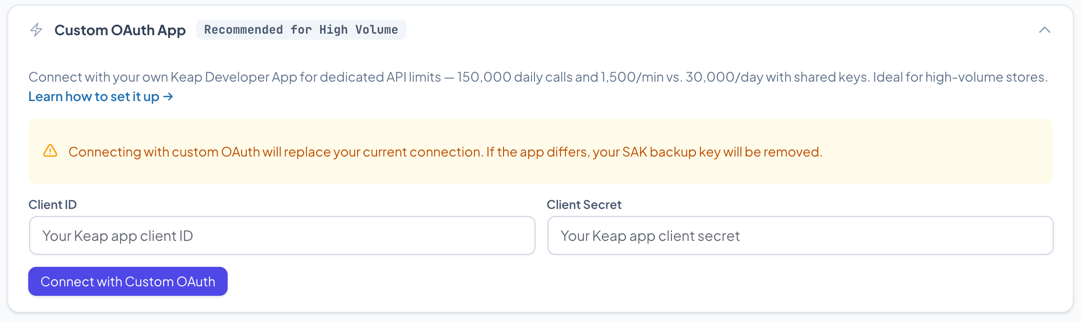
- Expand the Custom OAuth App section
- Enter your Client ID and Client Secret
- Click Connect with Custom OAuth
- You’ll be redirected to Keap to authorize your app
- After authorization, you’ll be redirected back to InfusedWoo
Once connected, the connection badge will show Custom OAuth in purple.
![]()
Managing Custom OAuth
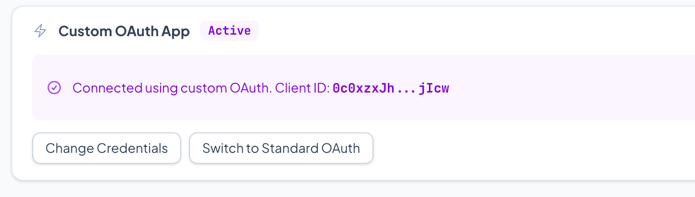
Viewing Your Configuration
When Custom OAuth is active, expanding the Custom OAuth section shows:
- A purple check with your masked Client ID
- Change Credentials button to update your Client ID/Secret
- Switch to Standard OAuth button to revert to InfusedWoo’s shared OAuth app
Updating Credentials
If you need to update your Client ID or Secret (e.g., you rotated your credentials):
- Expand the Custom OAuth App section
- Click Change Credentials
- Enter the new Client ID and Client Secret
- Click Reconnect with New Credentials
Switching Back to Standard OAuth
If you no longer need custom OAuth:
- Expand the Custom OAuth App section
- Click Switch to Standard OAuth
- You’ll be redirected to Keap to authorize via InfusedWoo’s standard OAuth app
- After authorization, the badge changes back to OAuth (green)
Note: Your custom OAuth app on the Keap Developer portal is not deleted — it’s just no longer used by InfusedWoo. You can switch back to it at any time.
Reconnecting
If you’re connected via Custom OAuth and click Reconnect (in the main connection card), InfusedWoo automatically uses your custom OAuth credentials. You don’t need to re-enter them.
SAK Backup with Custom OAuth
Your SAK backup key works the same way regardless of whether you use standard or custom OAuth. If your custom OAuth token refresh fails, InfusedWoo falls back to your SAK.
However, the SAK must belong to the same Keap app as your custom OAuth app. If you change your custom OAuth to a different Keap app, InfusedWoo will clear the SAK backup (since it belongs to the old app).
Troubleshooting
”Failed to generate OAuth URL”
- Verify your Client ID is correct
- Make sure your Keap Developer App is active and not suspended
Authorization Fails or Redirects to Wrong Page
- Verify your Client ID and Client Secret are entered correctly
- Make sure your Keap Developer App is not suspended or deleted
Still Getting Rate Limited
- Verify the badge shows Custom OAuth (purple), not standard OAuth (green)
- Rate limits apply per Keap app — if other integrations share the same app, they share the limits
- Check your current usage in the Keap Developer portal under your app’s analytics
Connection Shows Standard OAuth After Reconnect
- If you clicked Reconnect and it connected via standard OAuth, your custom credentials may have been cleared. Go to the Custom OAuth section, click Change Credentials, and re-enter them.