Checkout Custom Fields
Add custom fields to WooCommerce checkout and map them to Keap contact fields.
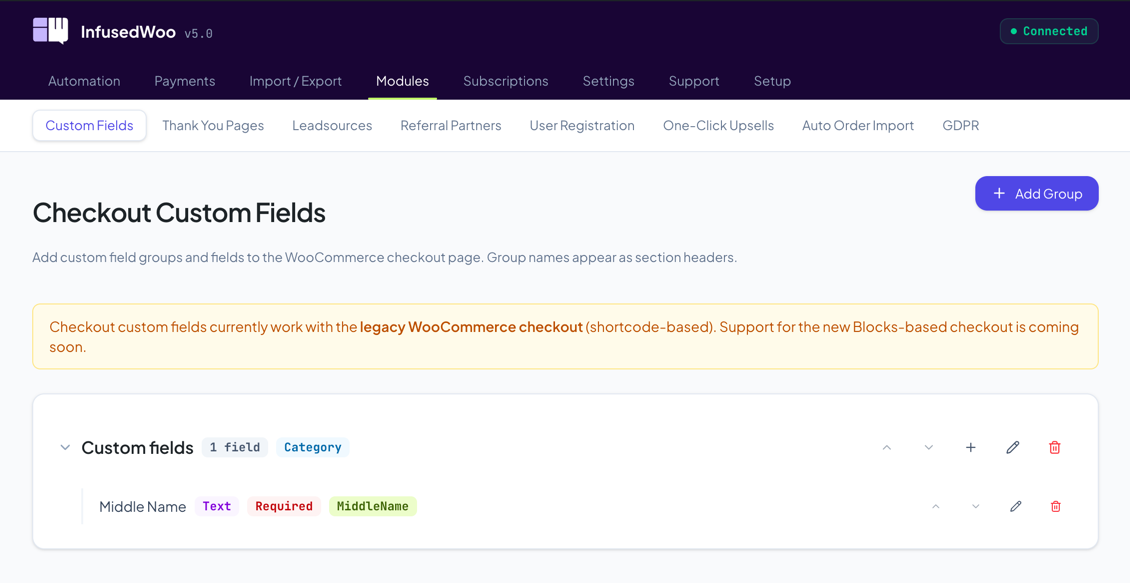
Add custom fields to your WooCommerce checkout and map them to Keap contact fields. Fields are organized into groups that serve as section headers at checkout.
Navigate to InfusedWoo > Modules > Custom Fields.
How It Works
- Create a field group (acts as a section heading at checkout).
- Add fields inside each group.
- Configure each field’s type, label, and Keap mapping.
- When a customer checks out, field values are saved to their Keap contact record.
Managing Groups
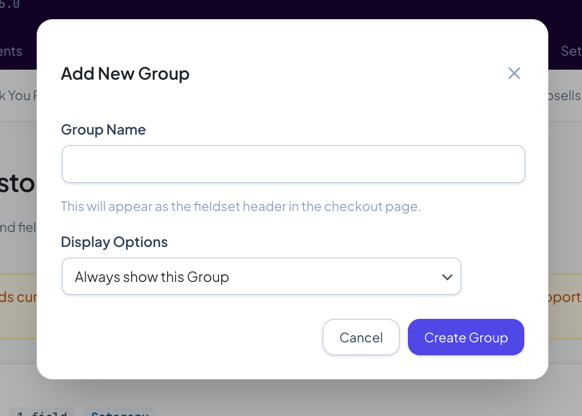
Click Add Group to create a new field group. Each group has:
- Group Name — Displayed as a section header at checkout.
- Display Conditions — Control when the group appears (optional).
Groups contain one or more fields. Drag groups to reorder them.
Adding Fields
Click the + icon on a group row to add a field inside it.
Field Settings
| Setting | Description |
|---|---|
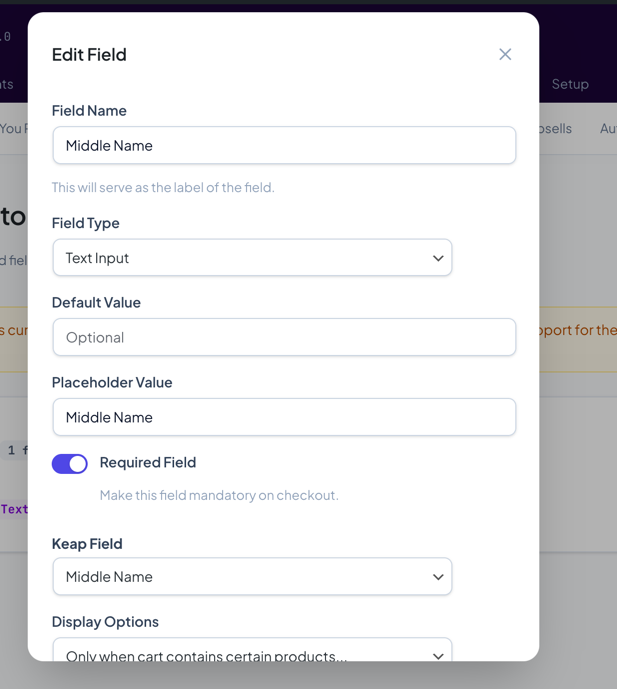
| Label | The label shown to customers at checkout |
| Field Type | Text, Textarea, Dropdown, Multi-select, Date, Radio, Checkbox, or Hidden |
| Required | Whether the field must be filled in to complete checkout |
| Default Value | Pre-filled value (optional) |
| Placeholder | Hint text shown in empty fields (optional) |
| Keap Field | The Keap contact field to save the value to |
| Display Conditions | Control when this field appears (optional) |
Field Types
| Type | Description |
|---|---|
| Text | Single-line text input |
| Textarea | Multi-line text input |
| Dropdown | Select from predefined options |
| Multi-select | Select multiple options |
| Date | Date picker |
| Radio | Radio button options |
| Checkbox | Checkbox (yes/no) |
| Hidden | Hidden field with a preset value (not visible to customer) |
For dropdown, multi-select, and radio types, you define the available options.
Display Conditions
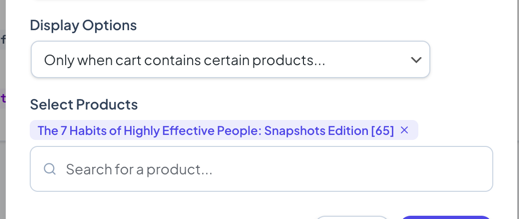
Both groups and individual fields support display conditions. You can show or hide a group/field based on:
- Cart contents
- Customer tags in Keap
- Other field values
This lets you create dynamic checkout forms that adapt based on the customer or their cart.
Tips
- Standard WooCommerce billing/shipping fields are synced automatically — you don’t need to add them here.
- Keap custom fields must be created in Keap first before they appear in the mapping dropdown.
- Use hidden fields to silently pass data to Keap (e.g., a campaign source identifier).
- Use display conditions to keep the checkout clean — only show fields relevant to the customer’s purchase.