Advanced Features
Recipe management, trigger logs, manual triggers, export/import, and more.
Automation Recipes — Advanced Features
Recipe Management
Activating & Deactivating
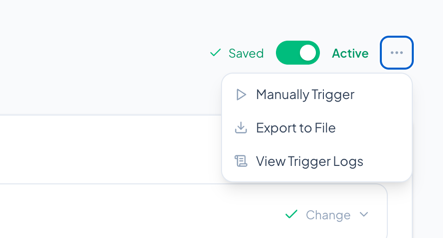
Use the toggle switch in the recipe editor header to activate or deactivate a recipe. Active recipes have a green toggle and show “Active” next to it.
You can also toggle recipes from the recipe list page using the Activate/Deactivate button on each card.
Renaming a Recipe
Click the pencil icon next to the recipe title to enter edit mode. Type the new name and press Enter, or click away to save.
Auto-Save
The recipe editor auto-saves your changes after a short delay (about 1.5 seconds of inactivity). You’ll see the save status indicator in the header:
- Saving… — Changes are being saved
- Saved — All changes are saved
- Save failed — An error occurred (check your connection)
Recipe Errors & Validation
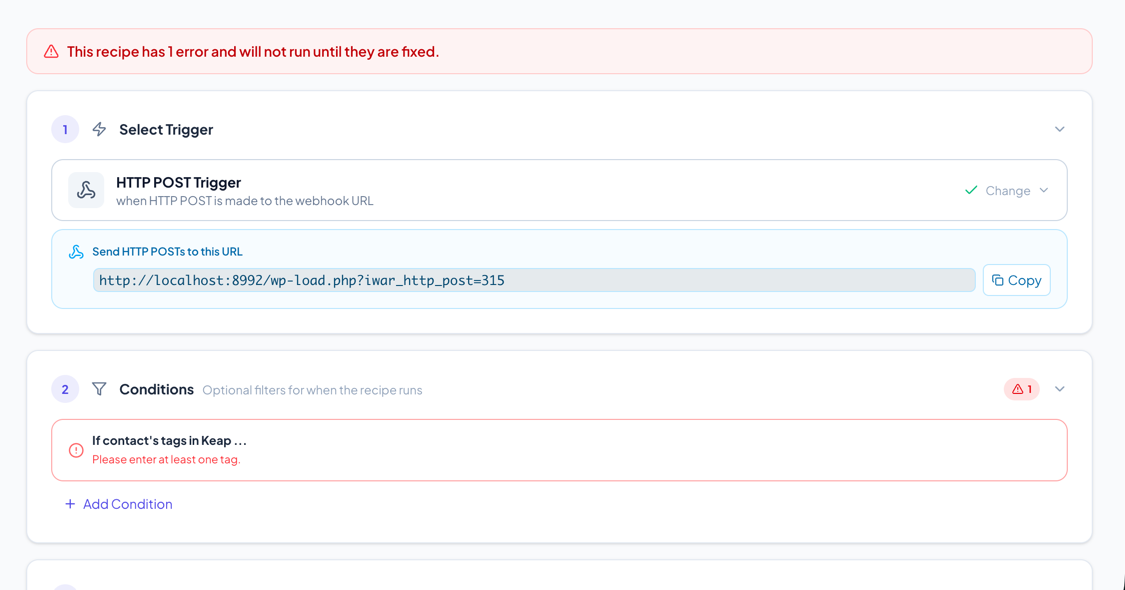
Recipes are validated on every save. Errors prevent the recipe from running, even if it’s active.
Error Types
- Missing required fields — A condition or action has empty required fields (shown with a red border and error message)
- Incompatible items — A condition or action doesn’t work with the selected trigger (shown with red border, only delete is available)
- Invalid values — A field has an incorrect format (e.g., invalid URL, non-numeric fee amount)
Error Indicators
- Error banner at the top of the editor showing the total error count
- Error badges on the step headers (Conditions, Actions) showing per-section error counts
- Red borders on individual condition/action cards with specific error messages
- Error badge on the recipe list page for recipes with errors
Trigger Logs
View the history of recipe triggers to monitor activity and debug issues.
- Click the ellipsis menu (…) in the recipe editor header
- Select View Trigger Logs
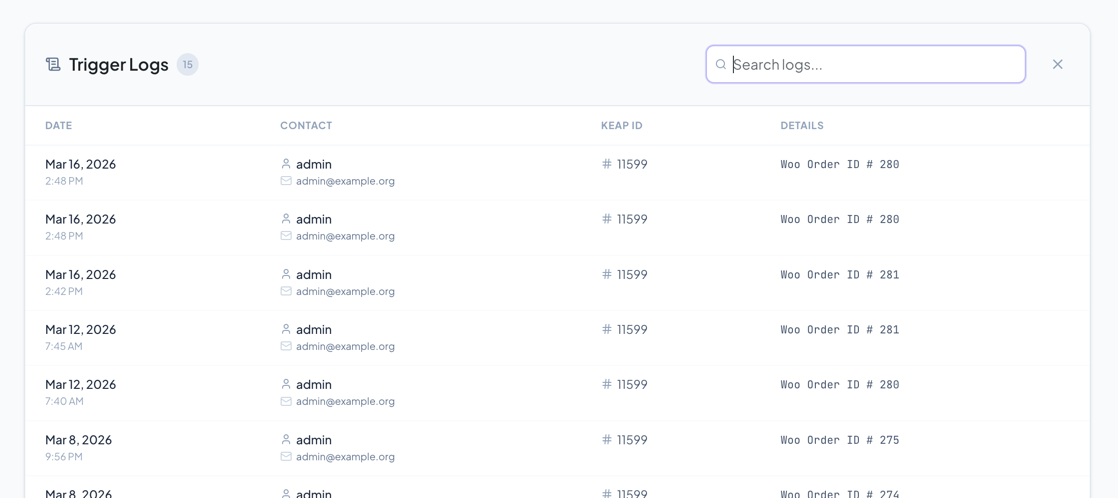
- A log panel opens below the header showing a table of recent triggers
Log Information
Each log entry shows:
- Date — When the trigger fired
- Contact — The WordPress user (name and email) associated with the trigger
- Keap ID — The Keap contact ID (if the contact was found in Keap)
- Details — Additional information from the trigger (e.g., POST data, order info)
Click a row to expand the full details.
Searching Logs
Use the search field in the log panel header to filter logs. The search queries the log content on the server, so it works across all pages.
Pagination
Logs are paginated with 20 entries per page. Use the arrow buttons at the bottom to navigate.
Manual Trigger
Run a recipe manually for a specific contact, useful for testing or one-off actions.
- Click the ellipsis menu (…) in the recipe editor header (or on the recipe list page)
- Select Manually Trigger
- Enter the contact’s email address
- The recipe runs immediately for that contact
Note: Manual triggers bypass conditions — only the actions are executed.
Export & Import
Exporting a Recipe
- Click the ellipsis menu (…) in the recipe editor header or recipe list
- Select Export to File
- A
.conffile is downloaded containing the recipe configuration
Importing a Recipe
- On the recipe list page, click Import Recipe
- Select a
.conffile previously exported - A new recipe is created with the imported configuration
Custom Email Override
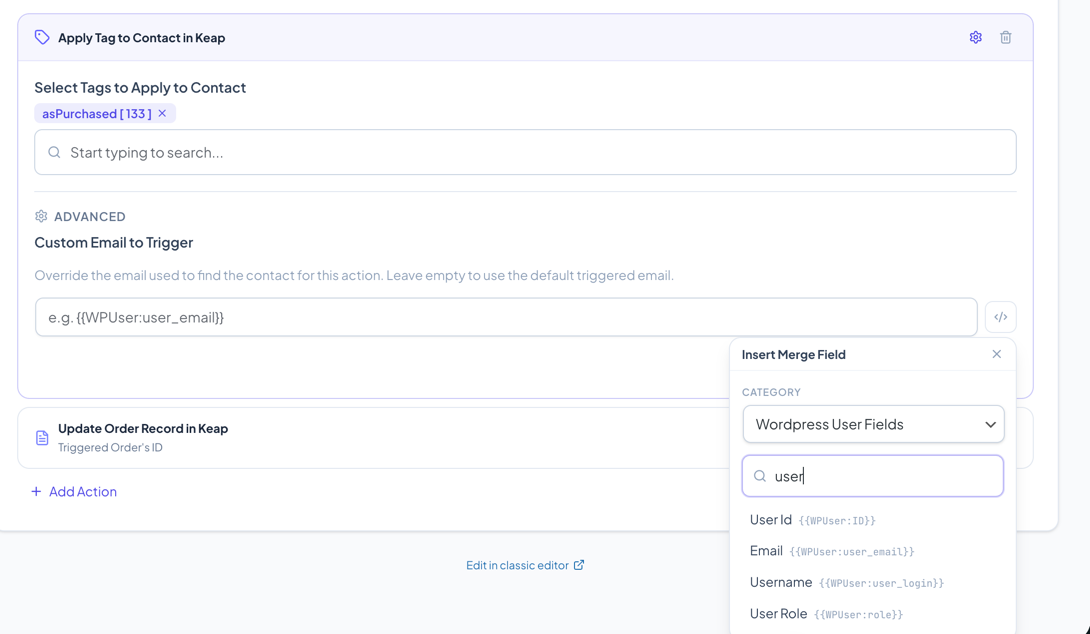
By default, each action uses the email from the trigger event to identify the contact. You can override this per-action:
- Expand the action
- Click the gear icon in the header bar
- Under Advanced, enter a custom email in the “Custom Email to Trigger” field
- You can use merge fields (e.g.,
{{WPUser:user_email}}) - When set, a Custom Email badge appears on the collapsed card
Use cases:
- Apply tags to a different contact than the purchaser
- Use a billing email that’s different from the logged-in user
- Process actions for a contact referenced in a custom field
Legacy Actions
Actions marked with a Legacy badge rely on Keap’s XML-RPC API, which is scheduled for retirement. These actions still work but should be migrated to modern alternatives:
| Legacy Action | Recommended Alternative |
|---|---|
| Run Action Set to Contact in Keap | Use Campaign Goals (Trigger a Campaign API Goal) |
| Send Email (Keap Emailer) | Use WooCommerce Email action or Campaign Goals |
Legacy actions show a deprecation warning when expanded with a link to the migration guide.
Classic Editor
If you need to use the classic (old) recipe editor — for example, to configure custom conditions/actions that haven’t been migrated to the new admin — click the Edit in classic editor link at the very bottom of the recipe editor page. This opens the old editor in a new tab.

Conditions/Actions Without New Admin Support
Some custom or third-party conditions/actions may not have full support in the new recipe editor. These show:
- An amber border with an info icon
- A message: “Use the old admin editor to configure this condition/action”
- The item cannot be edited in the new admin, but it can be removed
Use the classic editor link to configure these items.
Webhook URLs
Some triggers and conditions generate webhook URLs for external integrations:
HTTP POST Trigger
When selected, the webhook URL is displayed below the trigger with a Copy button:
https://yoursite.com/wp-load.php?iwar_http_post={recipe_id}
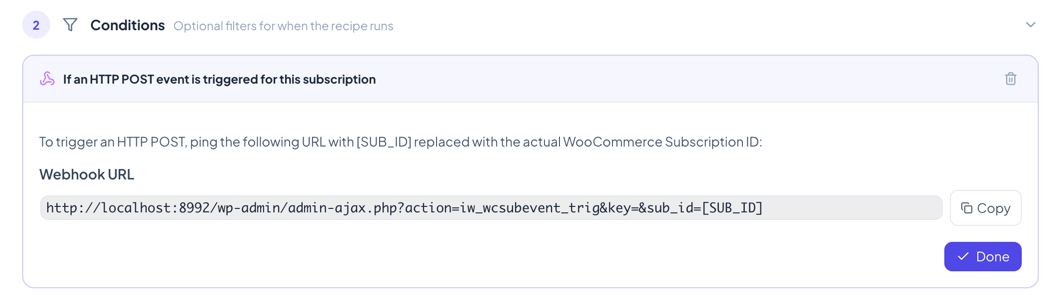
Subscription HTTP POST Condition
The condition shows a webhook URL with [SUB_ID] placeholder:
https://yoursite.com/wp-admin/admin-ajax.php?action=iw_wcsubevent_trig&key=abc123&sub_id=[SUB_ID]
Replace [SUB_ID] with the actual WooCommerce Subscription ID when calling the URL.
Tips & Best Practices
- Start simple — Create recipes with one trigger and one action first, then add complexity
- Test with manual trigger — Use the manual trigger feature to test recipes before activating
- Check logs — After activating, monitor the trigger logs to ensure the recipe runs correctly
- Use conditions wisely — Conditions are AND logic (all must pass). Use multiple instances of the same condition for complex rules
- Name your recipes — Use descriptive names that explain what the recipe does
- Monitor errors — Check the recipe list for error badges and fix them promptly
- Export backups — Export important recipes before making major changes