How to Offer Payment Plans at WooCommerce Checkout with Keap
Here’s a scenario you’ve probably seen before: a customer lands on your $497 course, your $299 supplement bundle, or your $1,200 coaching package. They want it. They need it. But the single upfront payment gives them pause, and they close the tab.
Now imagine that same checkout page offered a “3 payments of $99” option right next to the full price. That’s the difference between a bounce and a sale.
Payment plans aren’t just for SaaS companies and car dealerships anymore. They’re a proven conversion tool for WooCommerce stores — and with InfusedWoo’s Keap payment gateway, setting them up takes about ten minutes.
Why Payment Plans Work
The psychology is simple: lower perceived cost, higher conversion rate. A $297 product feels expensive. Three payments of $99 feels manageable — even though the customer might pay slightly more in total.
The data backs this up consistently:
- Stores offering payment plans see 20-30% higher conversion rates on eligible products
- Average order value typically increases by 15-25% when installment options are available
- Cart abandonment drops measurably on high-ticket items when a split-pay option is presented
Payment plans also open your products to a wider audience. Not everyone has $500 to spend today, but many people can handle $125/month for four months. You’re not discounting — you’re removing a barrier.
Prerequisites
Before you start, make sure you have:
- InfusedWoo Pro, Business, or Agency plan installed and activated
- Keap payment gateway enabled in InfusedWoo settings (Settings > Payment Gateway)
- A Keap merchant account connected and processing payments
- At least one product priced high enough to warrant installments (payment plans on a $15 item don’t make much sense)
If you haven’t set up the Keap payment gateway yet, head to our gateway setup guide first. It takes about five minutes.
Creating a Payment Plan: Step by Step
Navigate to InfusedWoo > PayPlans in your WordPress admin. Click Add New Payment Plan.
Step 1: Name Your Plan
Give your plan a clear, customer-facing name. This is what shoppers will see at checkout, so make it descriptive:
- “3 Monthly Payments” (good)
- “Pay in 4 Installments” (good)
- “Plan B” (not helpful)
The name should instantly communicate what the customer is signing up for.
Step 2: Configure Payment Schedule
This is where the core setup happens. You’ll define four key parameters:
Number of Payments: How many installments the customer will make. For a $300 product, three or four payments is the sweet spot. For $1,000+ products, you might go up to six or twelve.
Payment Interval: The time between each payment — typically monthly, but you can also set weekly or biweekly intervals. Monthly is the standard expectation for most customers.
Finance Charge (Optional): If you want to offset the risk and administrative cost of installment billing, you can add a percentage-based finance charge. For example, a 5% finance charge on a $300 product would make the total $315 across all installments. Many stores set this to 0% as a conversion incentive and treat the cost of capital as a marketing expense.
Trial Period (Optional): This one’s interesting. You can set a trial period before the first payment is charged. For subscription-style products or membership sites, a 7- or 14-day trial lets customers experience the product before committing. The first installment charges after the trial ends.
Step 3: Set Conditions
Conditions control when the payment plan appears at checkout. This is crucial — you don’t want to offer a 6-month payment plan on a $20 t-shirt.
The most common condition is cart total. Set a minimum cart value (e.g., “Show this plan when cart total is greater than $200”) to ensure payment plans only appear for purchases where they make sense.
You can also set conditions based on:
- Specific products — only show the plan for certain items
- Product categories — enable installments for your “Premium” category but not “Accessories”
- User roles — offer special terms to wholesale customers or members
Conditions can be combined, so you can get as granular as you need. A common setup: “Show 3-payment plan when cart total > $200, show 6-payment plan when cart total > $500.”
Step 4: Test with the Simulator
Before you go live, use InfusedWoo’s built-in PayPlan Simulator. This tool lets you enter a cart total and see exactly which payment plans will be offered, what each installment amount will be, and the complete payment schedule with dates.
This is invaluable for sanity-checking your setup. Enter a few different cart totals and verify the math looks right. Check that your conditions are triggering correctly. Make sure the installment amounts feel reasonable from a customer’s perspective.
The simulator saves you from the classic “let me just place a real test order” debugging cycle. Use it.
Step 5: Save and Activate
Once you’re satisfied with the configuration and simulator results, save your payment plan and set its status to Active. It will immediately appear as an option at checkout for orders matching your conditions.
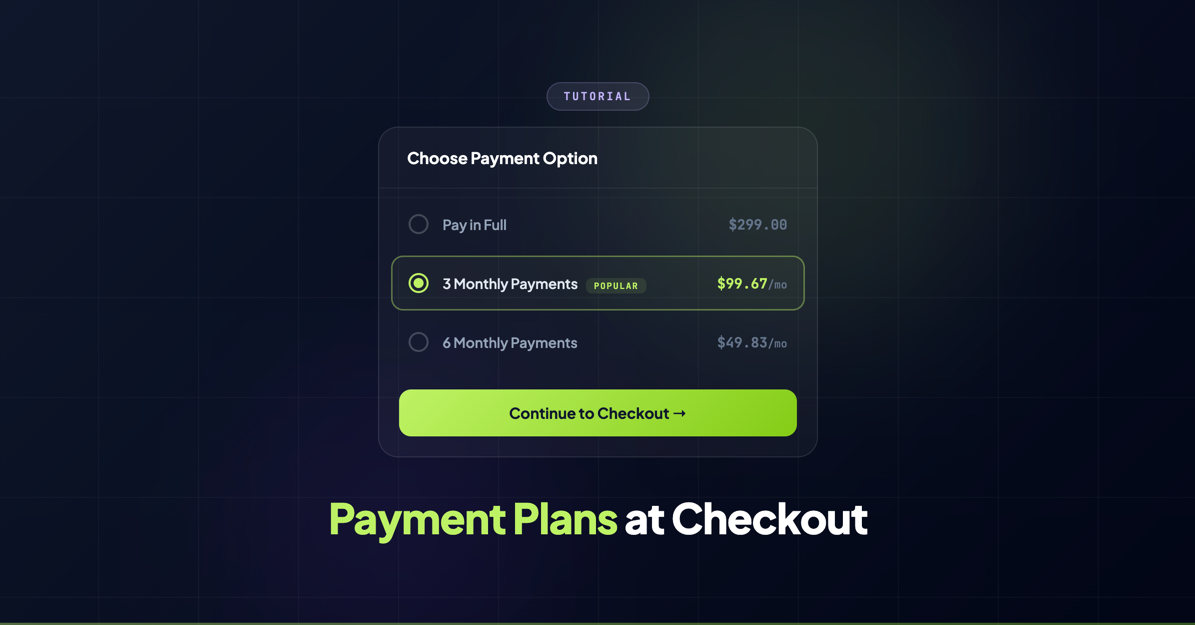
What Customers See at Checkout
From the customer’s perspective, the experience is clean and straightforward. When their cart qualifies for one or more payment plans, they’ll see the available options displayed alongside the standard “Pay in Full” option on the checkout page.
Each plan shows:
- The plan name (“3 Monthly Payments”)
- The individual installment amount (“3 x $99.00”)
- The total cost including any finance charges (“Total: $297.00”)
- The payment schedule (“First payment today, then monthly”)
The customer selects their preferred option, enters their payment details, and checks out normally. Keap handles the recurring billing automatically — charging the customer’s card on schedule and updating their contact record with each payment.
If a payment fails, Keap’s built-in retry logic kicks in, and InfusedWoo keeps the order status synced in WooCommerce. You can also set up Keap automation sequences to notify customers about upcoming payments or handle failed charge scenarios.
Tips for Getting the Most Out of Payment Plans
Start simple. One or two payment plans covering your most common price points is plenty. You can always add more later based on what customers respond to.
Price the installments psychologically. If your product is $297, a 3-payment plan of $99 each feels cleaner than a 4-payment plan of $74.25. Round numbers reduce cognitive friction.
A/B test finance charges. Some stores find that a small finance charge (3-5%) has zero impact on conversion but meaningfully offsets risk. Others find that 0% financing is a powerful marketing message. Test both.
Mention payment plans in your marketing. “Starting at $99/month” in your ads and landing pages can dramatically improve click-through rates. Don’t hide the option until checkout.
Monitor completion rates. Keep an eye on how many customers complete all installments versus dropping off mid-plan. If your completion rate drops below 85%, your plans might be too long or your price point needs adjustment.
Wrapping Up
Payment plans remove one of the biggest objections in ecommerce: “I can’t afford this right now.” By splitting the cost into manageable installments, you make your products accessible to more customers while increasing your average order value.
With InfusedWoo and the Keap payment gateway, the entire setup lives inside your existing WooCommerce workflow. No third-party financing apps. No complicated integrations. Just configure, simulate, activate, and start converting more sales.
For the full technical reference, visit our Payment Plans documentation.